


Using IAM the secure way in GitHub Actions

There comes a time in every DevOps Engineer’s life when they must ask: ‘why static IAM credentials’? Well, this is an asking I have answered a couple of times across environments, but we’ve recently started asking this at ALT-F4 too.
For context, when I refer to ‘static IAM credentials’, I’m talking about access keys assigned to an IAM user. The issue with these is that they’re, y’know… static. If someone manages to sniff them out somehow, they now have your credentials and can use them however they want. They also need rotating to combat that from happening under your nose for too long.

But what if there was a better way to manage AWS access? Enter IAM roles. IAM roles don’t use static credentials whatsoever, they’re dynamically used in a process called assumption. Assumption takes something called a ‘trust policy’, which is essentially a normal IAM policy that applies to whether or not you are able to assume the role, and generates dynamic credentials for you that last a very limited amount of time. This is great for things like EC2 or ECS, where you’ve got a long-running process that needs access to other AWS services, but it can also be used for fun and profit tasks that run outside of AWS too.
At one point in time, all our GitHub Actions workflows (used for CI & CD of things like Terraform and deploys to things like this blog) were using an IAM user access key to reach AWS. But there’s a better way. GitHub Actions jobs get something called an ‘ID token’ that they use to authenticate against GitHub itself to run actions. These actions are things like actions/checkout, and actions/upload-artifact. However, because this ID token is provided by an OpenID Connect provider GitHub runs specifically for Actions, we can use that to authenticate our jobs against AWS through an IAM role.
IAM Identity Providers
IAM has this nice little feature built-in that allows you to configure what I’ll be referring to as ‘web identities’. This comes in the form of the Identity Providers API. It allows you to configure either a SAML IdP or OpenID Connect provider as an IAM Identity Provider, and use that to verify (and trust) tokens that are issued by it. GitHub, handily, provides an OpenID Connect provider for its actions to run, as I mentioned before.
In our case, we want to authenticate GitHub Actions against IAM, so we can configure an OpenID Connect provider for job ID tokens.
To do this, let’s go to the IAM console, and find the Identity Providers section in the sidebar.
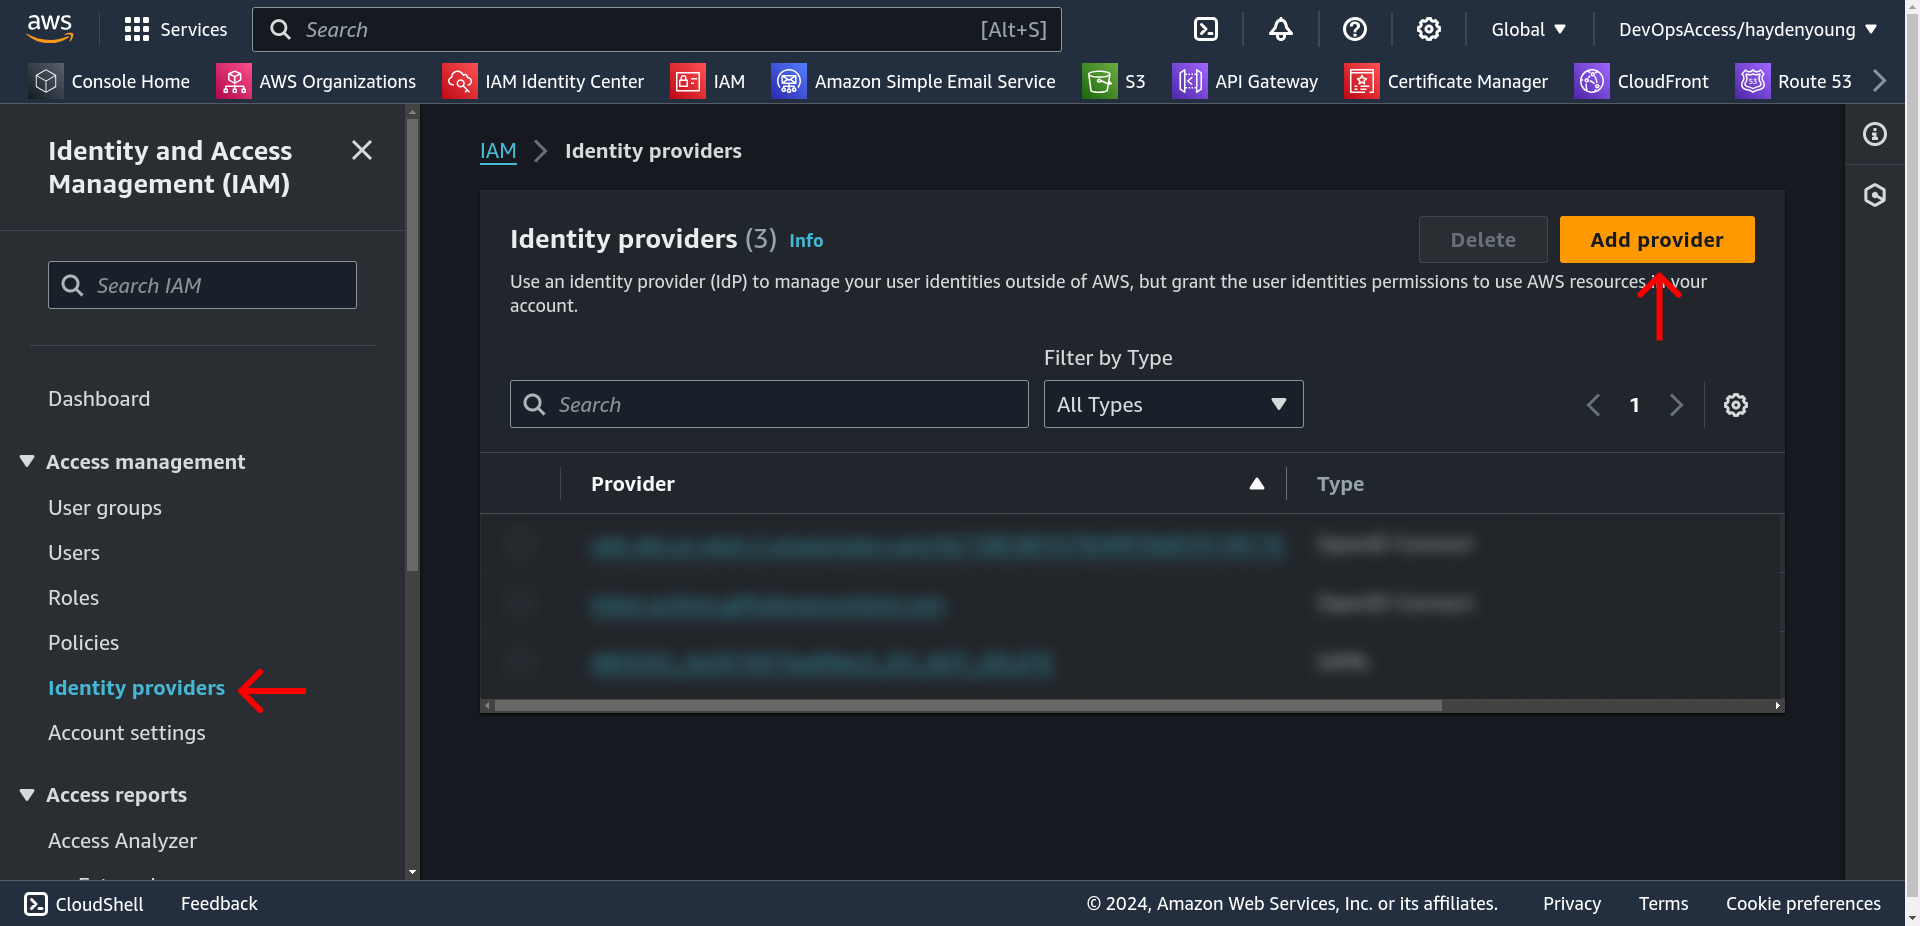
Once we’re there, we can click that nice big orange “Add Provider” button in the top right.
To fill in the form, we’re going to choose OpenID Connect for our Provider Type and set the following values:
- Provider URL:
https://token.actions.githubusercontent.com - Audience:
sts.amazonaws.com
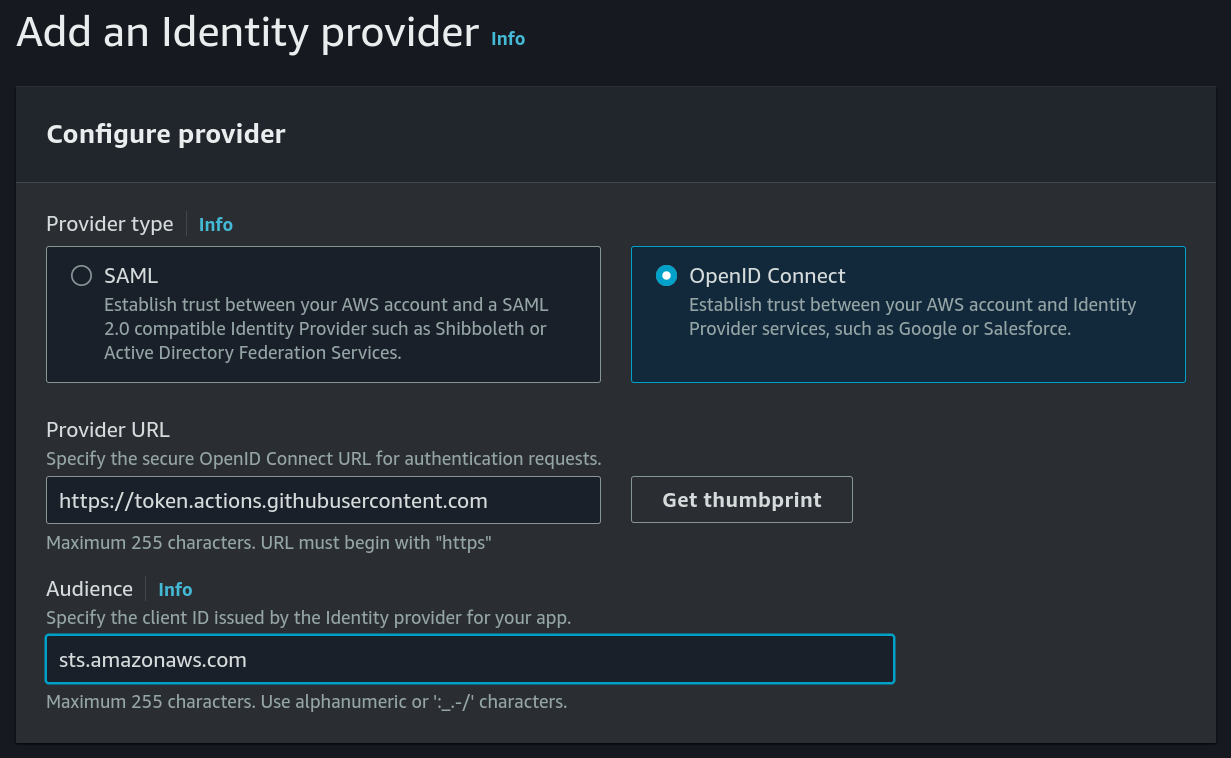
Once that form is filled, we can hit “Get Thumbprint” next to Provider URL and then “Add Provider” at the bottom of the page to save it.
We should now see a new entry back on the Identity Providers page for our GitHub Actions provider:

Creating an IAM Role
While we’re still in the AWS console, let’s go and create our first IAM role. We’ll plan out our permissions now, so it’s easier. We’re going to be really insecure and give our role the AdministratorAccess policy, because we’re just lazy like that, what can I say?
We’re also going to want to use this role when we run our deploy-site job in GitHub Actions. The repo we’re doing that from is my-cool-org/my-cool-site, and we want it to run against the main branch.
Cool, so now we know what permissions it wants as well as where we’re accessing AWS from, we can continue and get role-making.
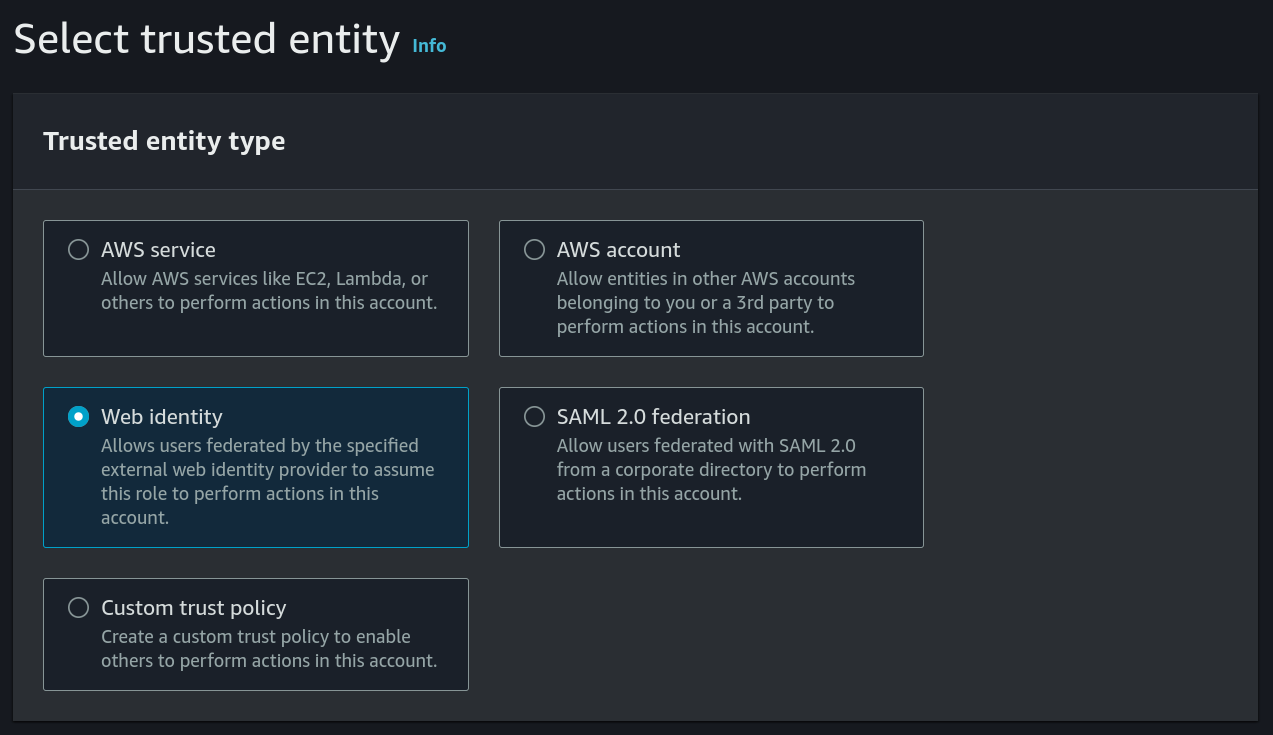
Head to the IAM console again and go to the Roles page. Hit the big orange Create Role button, and you should be greeted with the new role form.
For Trusted Entity Type, we’re going to select Web Identity.
We’re then going to fill in the next part of the form, which cleverly gives us more options once we select our GitHub Actions provider.
We’re going to fill it in as follows:
- Identity provider:
token.actions.githubusercontent.com - Audience:
sts.amazonaws.com - GitHub organization:
my-cool-org - GitHub repository:
my-cool-site - GitHub branch:
main

Note
To find out more about the trust policy being generated here, as well as some other cool things you can do with it, have a look at the GitHub documentation for this whole process.
Once that’s done, we can hit Next and cement ourselves as the security team’s worst nightmare by giving it the AdministratorAccess policy and hitting _Next _again.

Important
Please, do not do this on any resources. Use of the AdministratorAccess policy should be _heavily _controlled, and is only in use here for the purposes of demonstration. You’ve been warned.
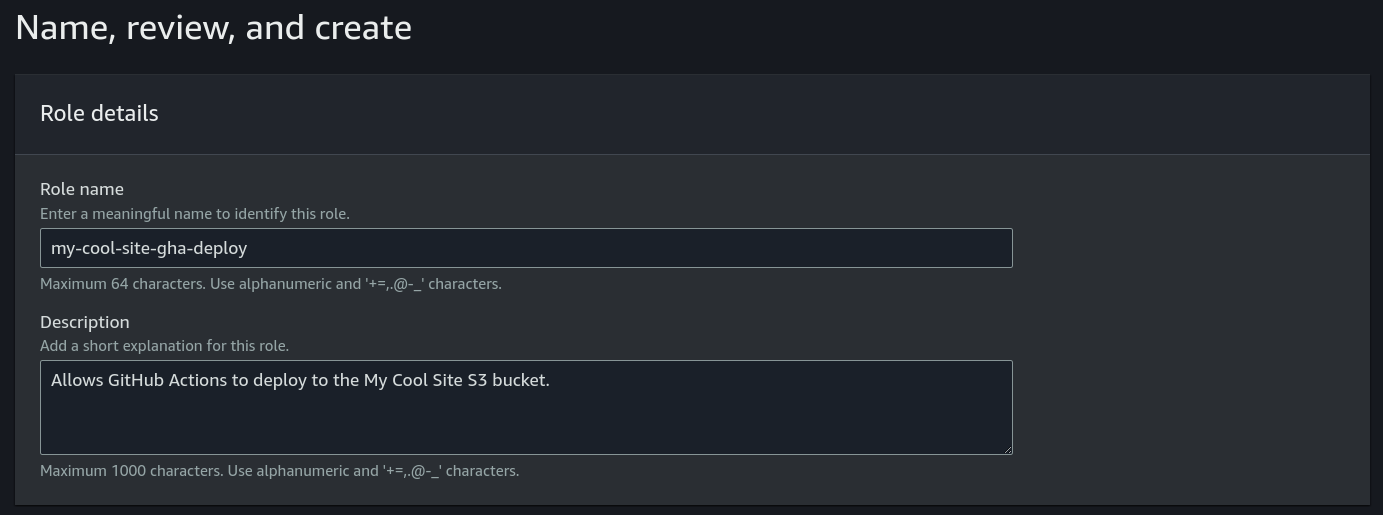
Finally, let’s give our role a meaningful name and description (because we love the auditing team, just not security) and click Create Role.
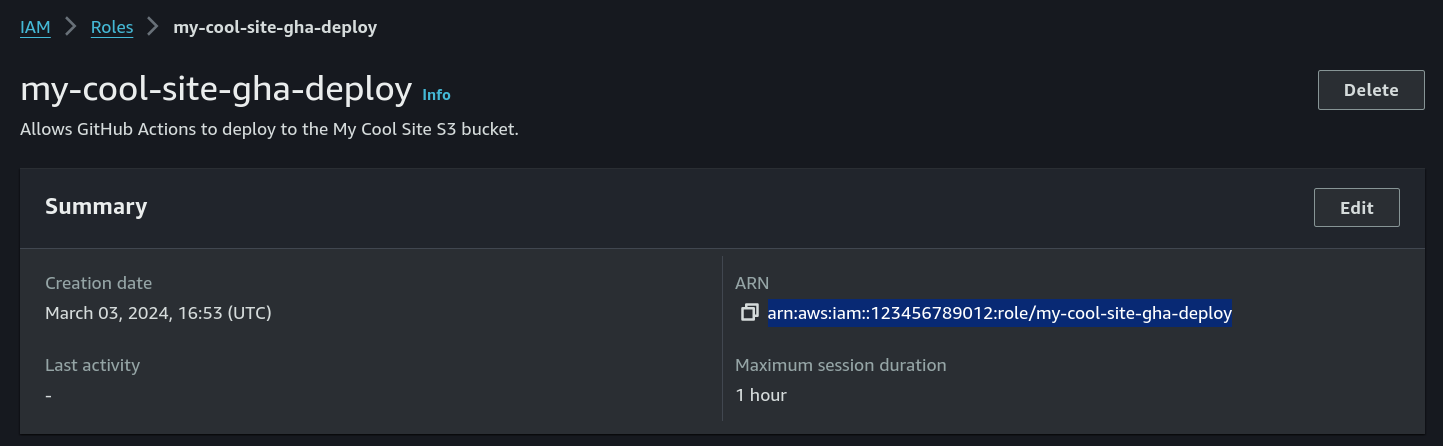
Cool. The role’s been created. Let’s quickly search my-cool-site-gha-deploy in the roles list and grab the ARN from it.
Hooking it up to GitHub Actions
Finally, our trip to the IAM console is over! Now… now we need to delve into YAML instead. Not much more fun, if you ask me.

In our my-cool-site repo, we can go ahead and open the mystical workflow file we have.
---
on:
	push:
		branches: [main]

jobs:
	deploy:
		runs-on: ubuntu-latest
		env:
			AWS_ACCESS_KEY_ID: ${{ secrets.AWS_ACCESS_KEY_ID }}
			AWS_SECRET_ACCESS_KEY: ${{ secrets.AWS_SECRET_ACCESS_KEY }}
			AWS_REGION: us-west-2
		steps:
			- uses: actions/checkout@v4
			- run: aws s3 sync . s3://my-cool-site/ --delete --acl public-read
So we’re currently using static credentials to deploy this. Blegh. Let’s go over what we need to ditch this ugly stuff.
- First, we need to get access to our ID token as part of the job so we can use it to hit AWS with
- Then, we need to use that ID token to try and assume our new role.
That’s… surprisingly little. It boils down to adding two things to our action; first, we need to set the permissions for our action correctly:
jobs:
	deploy:
		permissions:
			id-token: write
			contents: read
Cool, done. Next, we need to somehow assume our IAM role using that token. Luckily, AWS have already built this out for us in the form of aws-actions/configure-aws-credentials. Looking through the documentation shows us that we only need to add a small snippet at the start of our job’s steps:
jobs:
	deploy:
		steps:
			- uses: aws-actions/configure-aws-credentials@v4
				with:
					aws-region: us-west-2
					role-to-assume: arn:aws:iam::123456789012:role/my-cool-site-gha-deploy
Nice! So now, we can get shot of all the AWS_* environment variables we declared, because they’ve all been replaced by this one action.
At this point, that’s all we actually need to play around with. When we push our new workflow to main, we should now be in a state where (without having given it any static credentials whatsoever) the job should be able to assume our IAM role and essentially infer access to AWS services.
In Conclusion
So what have we actually achieved here? Well;
- We’ve done away with static credentials that can be stolen easily and need manual rotation on a regular basis
- We’ve implemented a more secure way for GitHub to talk to AWS on our CI/CD pipelines
- We’ve learned a bit about how AWS operates with regards to roles & assumption.
Pretty good spread for reading a single blog post, don’t you think?
Hopefully, you’ll agree that this is a pretty useful (not to mention, as I have several times in this post, more secure) way of accessing AWS from GitHub Actions, and now I bid you farewell. Go forth and continuously integrate IAM roles into your continuous deployments!
Further Reading
There’s some useful documentation on all this if you dig around a bit, so I felt I should list some of these pages for you.
- The official documentation for implementing this setup: https://docs.github.com/en/actions/deployment/security-hardening-your-deployments/configuring-openid-connect-in-amazon-web-services
- Documentation on all the subject claims available for you to use with trust policies from Actions ID tokens: https://docs.github.com/en/actions/deployment/security-hardening-your-deployments/about-security-hardening-with-openid-connect#understanding-the-oidc-token
- AWS’ documentation on how to implement this: https://docs.aws.amazon.com/IAM/latest/UserGuide/id_roles_create_for-idp_oidc.html#idp_oidc_Create_GitHub
- Documentation for the aws-actions/configure-aws-credentials action, with regards to assuming a role using the Actions ID token: https://github.com/aws-actions/configure-aws-credentials?tab=readme-ov-file#oidc-audience